

Replacement Chips for Older Epson Printers: A 2026 Guide
Table of Contents
- Why Replacement Chips Matter for Older Epson Printers
- Compatible Printer Models and Chip Specifications
- How to Reset Epson Ink Cartridge Chips
- Troubleshooting Epson Printer Chip Errors
- Refillable Ink Cartridges for Epson and Cost Savings
- Installation Instructions for Replacement Chips
- Maintenance Kits and Accessories You'll Need
- Conclusion
Last Updated: August 27, 2026
Why Replacement Chips Matter for Older Epson Printers
Replacement chips manage ink level monitoring, printer authentication, and cartridge compatibility. Without functional chips, your printer won't recognize refillable or third-party cartridges, and you'll lose accurate ink consumption tracking.

Older Epson models, particularly the SureColor and WorkForce series, rely on these electronic components to communicate between the cartridge and the printhead. When a chip fails, the printer displays error messages, refuses to print, or defaults to OEM-only cartridges at premium costs. This creates a critical problem for high-volume print shops and professional users who depend on cost-effective refillable cartridge solutions.
Replacement chips restore cartridge recognition, enable refillable systems, and reduce per-milliliter ink costs dramatically. Whether you're running DTF, pigment, or eco-solvent inks, a functioning chip is the bridge between your cartridge and your printer's electronics.
Compatible Printer Models and Chip Specifications
Not all Epson printers use the same chip architecture. Understanding your specific model's requirements prevents costly mistakes and ensures seamless installation.
The SureColor T-series (T3270, T5270, T7270) uses a snap-on chip design compatible with 700ml refillable cartridges. The F-series models (F6070, F7070, F7170, F6200, F7200, F9370, F6370, F9470, F9470H) employ a different connector architecture with HD Black and Dye-based color chips.

The key difference lies in chip recognition pins and voltage specifications. Older models like the Epson Stylus Pro series use legacy firmware that may not recognize newer combo chips. Conversely, newer F-series printers expect chips with specific memory configurations to prevent false "cartridge not recognized" errors.
| Printer Model | Chip Type | Cartridge Capacity | Compatible Refillable System |
|---|---|---|---|
| SureColor T3270, T5270, T7270 | Snap-on | 700ml | Yes, with replacement chips |
| SureColor F6070, F7070, F7170 | Connector-based | Varies | Yes, with specific chips |
| SureColor F6200, F7200, F9370 | HD Black + Dye | Varies | Yes, with specific chips |
| SureColor F6370, F9470, F9470H | HD Black + Dye | Varies | Yes, with specific chips |
Printer Ink Pro stocks replacement chips for all major SureColor models. For the T-series, our chips cost $7.95 per set and snap directly onto 700ml refillable cartridges without tools. For the F-series, individual chips run $6.95 to $17.95 depending on the model.
Older WorkForce printers (WF-C5790, WF-C5710) use a different chip architecture entirely. These models support both single-use and permanent chips, but the connector pins are spaced differently than SureColor models. Confirm the chip pin configuration before purchase to avoid installation damage.
How to Reset Epson Ink Cartridge Chips
Resetting an Epson ink cartridge chip restores ink level monitoring and clears error messages that prevent printing. The process varies depending on whether you're using a single-use chip (resets automatically with each cartridge swap) or a permanent chip (requires manual intervention).
For single-use chips, the reset happens automatically when you remove the cartridge from the printer and install a new one (epson.com). For permanent chips, you'll need a chip resetter tool or the printer's maintenance menu. Most Epson printers allow manual chip reset through the Settings menu. Navigate to "Maintenance" → "Restore Ink Levels" or "Reset Cartridge."
The step-by-step process for menu-based reset:
- Open the printer's control panel or access the printer settings via USB connection.
- Navigate to the "Maintenance" or "System Settings" menu.
- Select "Restore Ink Levels" or "Reset Cartridge."
- Confirm the reset when prompted.
- Power cycle the printer to ensure the reset registers in the firmware.
For physical chip resets, locate the small reset button on the chip's surface. Using a paperclip or specialized reset tool, press the button firmly for 2-3 seconds. You'll hear a faint click. Remove and reinstall the cartridge, and the printer should recognize it with a full ink supply.
Single-use chips are preferable if your print volume is high and you swap cartridges frequently. Permanent chips are better for lower-volume operations where you refill the same cartridge multiple times before replacement.
Troubleshooting Epson Printer Chip Errors
Chip errors are the most common reason older Epson printers reject refillable cartridges or display warning messages. Diagnosing the root cause, whether it's a hardware issue, firmware incompatibility, or chip failure, determines your fix strategy.
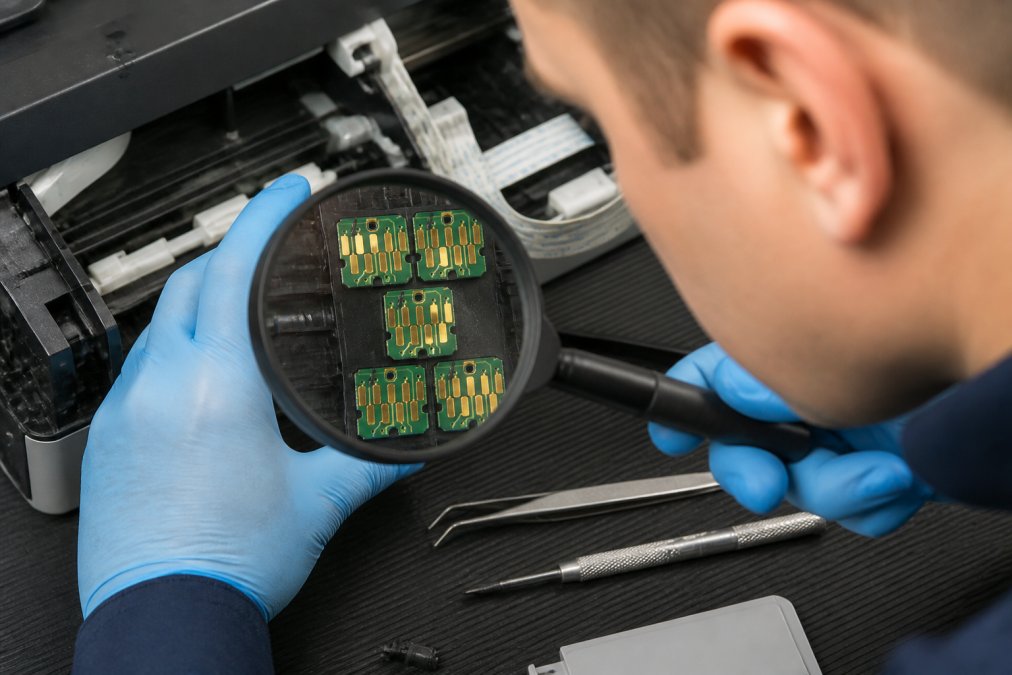
Chip Not Recognized
When your Epson printer displays "Cartridge not recognized" or "Cartridge error," the chip reader pins aren't making electrical contact with the chip's connector.
Remove the cartridge and inspect both the chip's connector pins and the printer's chip reader pins. Look for dust, dried ink residue, or corrosion. If you see debris, gently clean the chip's pins with a soft, dry cloth. For the printer's reader pins, use a cotton swab barely moistened with isopropyl alcohol. Allow the alcohol to evaporate completely before reinstalling the cartridge.
Reinsert the cartridge firmly until you hear a click. The cartridge should seat flush with the cartridge holder. Partial insertion causes intermittent contact and triggers error messages.
If cleaning doesn't resolve the issue, the chip itself may be defective. Test with a known-good chip of the same model. If the printer recognizes the replacement chip, your original chip failed and needs replacement.
Firmware version mismatches also cause "not recognized" errors. Check your printer's firmware version under Settings → Printer Information. If your firmware is more than three years old, contact Epson support or check their website for updates.
Ink Level Monitoring Issues
A functioning chip tracks ink consumption and displays accurate ink levels. When the chip fails, ink levels show incorrectly, often displaying "empty" when the cartridge is full.
Try resetting the chip using the method described in the previous section. If the ink level still shows incorrectly after reset, the chip's memory may be permanently damaged.
Alternatively, disable ink level monitoring in your printer settings. Navigate to Settings → Maintenance → Ink Level Alert and toggle it off. Your printer will continue printing without warnings, though you'll need to manually monitor ink consumption. For permanent solutions, replace the faulty chip with a new one from Printer Ink Pro.
Refillable Ink Cartridges for Epson and Cost Savings
Refillable cartridges paired with replacement chips transform your ink supply costs. Instead of buying new OEM cartridges at premium prices, you refill the same cartridge multiple times with bulk ink.
A single OEM SureColor cartridge costs substantially more per milliliter than bulk refill ink. When you refill a 700ml cartridge multiple times, your per-milliliter cost drops dramatically. A professional print shop running high-volume work can reduce monthly ink expenses by 60-70% by switching to refillable systems (peer-reviewed research).
The catch: your printer must recognize the refillable cartridge. Without a functioning chip, your Epson printer defaults to OEM-only mode and rejects refillable cartridges entirely.
Printer Ink Pro's refillable cartridges for SureColor T-series printers include compatible chips rated for 700ml of ink. Our chips snap onto the cartridge without tools and reset automatically when you install a fresh cartridge. For F-series models, we supply individual replacement chips compatible with your specific model's architecture.

The installation process is straightforward:
- Purchase refillable cartridges compatible with your printer model.
- Install replacement chips onto the cartridges (if not pre-installed).
- Fill the cartridges with bulk ink matching your printer's specifications.
- Insert the refillable cartridges into your printer.
- Run a cleaning cycle to purge air and establish ink flow.
Most refillable systems pay for themselves within 2-3 cartridge cycles (the FTC). After that, your ink costs are primarily the cost of bulk ink refills.
Installation Instructions for Replacement Chips
Installing a replacement chip is a five-minute task requiring no specialized tools. The process differs slightly between snap-on chips (T-series) and connector-based chips (F-series).
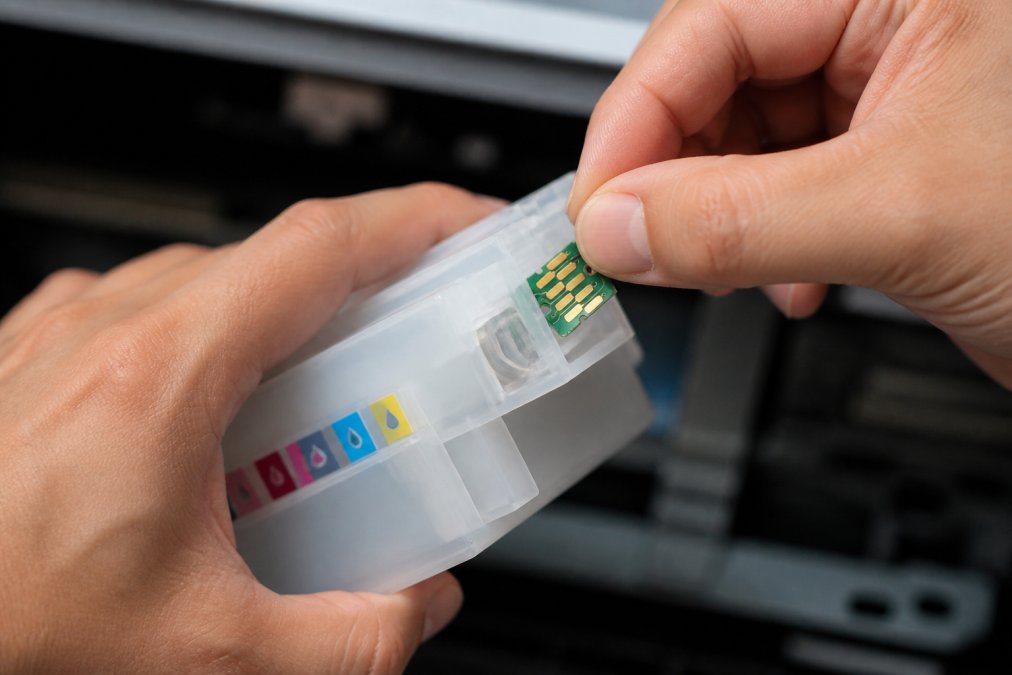
For snap-on chips (SureColor T-series):
- Remove the refillable cartridge from its packaging.
- Locate the chip connector on the cartridge's rear panel.
- Align the replacement chip's connector with the cartridge slot. The chip's pins should face downward into the slot.
- Press the chip firmly downward until you hear a distinct click.
- Verify the chip is secure by gently tugging on it.
- Install the cartridge into your printer by sliding it into the cartridge holder until it clicks into place.
For connector-based chips (F-series):
- Remove the refillable cartridge and inspect the chip connector.
- Align the replacement chip carefully. The connector has a keyed design; the chip will only fit one direction.
- Press the chip straight down until it seats completely.
- Double-check alignment by looking at the chip from the side.
- Install the cartridge into your printer.
Common installation mistakes include forcing the chip at an angle, partially seating the chip, and installing the chip upside-down. If you encounter resistance, stop immediately and realign carefully.
After installation, power on your printer and run a test print. The printer should recognize the cartridge within seconds. If you see an error message, remove the cartridge, verify chip seating, clean the pins, and try again.
Maintenance Kits and Accessories You'll Need
Beyond replacement chips, several accessories ensure your refillable cartridge system runs smoothly and prevents costly downtime.
A printhead cleaning kit is essential for preventing clogs, especially when using pigment or DTF inks. Run a cleaning cycle monthly or whenever you notice color banding or missing lines. Chip reader pin cleaners are small brushes or swabs designed specifically for cleaning the delicate pins on both the chip and the printer.
Refill bottles and syringes allow you to fill cartridges without mess. Bulk ink bottles come in 500ml or 1-liter sizes and cost significantly less per milliliter than OEM cartridges. Waste ink tanks collect excess ink during cleaning cycles. Once full, the printer stops functioning until the tank is replaced.
Printer Ink Pro offers a comprehensive range of printing supplies, including refillable cartridges, maintenance tanks, and replacement chips designed for various Epson and Canon printer models.
| Accessory | Purpose | Maintenance Frequency | Estimated Cost |
|---|---|---|---|
| Printhead Cleaning Kit | Prevent clogs, restore color accuracy | Monthly or as needed | $15-30 |
| Chip Reader Cleaner | Maintain electrical contact | Every 3 months | $5-10 |
| Refill Bottles (1L) | Bulk ink supply | As needed per volume | $20-40 per bottle |
| Waste Ink Tank Replacement | Manage waste ink capacity | When full | $25-50 |
| Maintenance Documentation | Reference and troubleshooting | Keep on hand | Free with purchase |
Older Epson printers remain workhorses for professional print shops when properly maintained with quality replacement chips and compatible refillable cartridges. The investment in replacement chips and accessories pays dividends through reduced downtime and lower supply costs.
Printer Ink Pro specializes in replacement chips for all major Epson models, from legacy SureColor T-series to current F-series equipment. Our products are engineered to deliver vibrant, long-lasting results, ensuring your equipment operates at peak performance. Whether you're running dye sublimation, DTF, pigment, or eco-solvent inks, we have the chips and accessories to keep your equipment running at peak performance. Get started with Printer Ink Pro and eliminate the cost and frustration of OEM-only cartridge dependencies.
Frequently Asked Questions
Q: How do I reset an Epson cartridge chip?
A: Most Epson cartridges have a reset button on the chip itself. Locate the small button on the chip's circuit board and press it firmly for 2-3 seconds using a pen or small tool. This clears the chip's memory and resets the ink counter. For refillable cartridges, ensure the chip is fully seated before resetting. If the printer still doesn't recognize it after reset, clean the chip reader pins on your printer's cartridge bay with a dry cloth to remove dust or ink residue.
Q: Are replacement chips compatible with all older Epson printer models?
A: No. Replacement chips are model-specific because different Epson printers use different chip readers and firmware versions. Chips designed for the SureColor T-series won't work with F-series printers, for example. Before purchasing, confirm your exact printer model and match it to the chip specifications. Printer Ink Pro offers chips for popular older models like the T3270, T5270, T7270, F6070, F7070, and F7170, with prices starting at $6.95 per chip.
Q: What's the cost difference between OEM and refillable cartridge chips?
A: Refillable cartridges with replacement chips cost significantly less over time. A single replacement chip from Printer Ink Pro runs $6.95 to $17.95, while OEM cartridges often cost $30-$60 each. For high-volume operations printing DTF, dye sublimation, or pigment work, switching to refillable cartridges can save hundreds monthly. The upfront investment in refillable hardware pays for itself within 2-3 months of regular printing, especially for professional print shops.
Q: What should I do if my Epson printer doesn't recognize a new chip?
A: First, power off the printer completely and wait 30 seconds before powering back on. Remove the cartridge and inspect both the chip and the chip reader pins in the printer for dust, ink splatter, or corrosion. Clean the reader pins gently with a lint-free cloth. Reinstall the cartridge and press the reset button on the chip. If the error persists, check your printer's firmware version, older firmware sometimes has compatibility issues with replacement chips. Consult your printer's manual or contact support for firmware update instructions.
This article was written using GrandRanker