

Refillable Cartridge Maintenance Tips 2026: Step-by-Step
Table of Contents
- Why Refillable Cartridge Maintenance Matters in 2026
- What You'll Need Before You Start
- Step 1: How to Clean Printer Ink Cartridges Safely
- Step 2: Preventing Printhead Clogs with Refillable Ink
- Step 3: Ink Cartridge Chip Reset Guide
- Step 4: Refilling Without Overfilling or Air Bubbles
- Step 5: Storage, Material Compatibility, and Long-Term Care
- Common Mistakes That Shorten Cartridge Lifespan
- Frequently Asked Questions
Last Updated: September 12, 2026
Why Refillable Cartridge Maintenance Matters in 2026
A refillable cartridge maintenance routine is the difference between a print system that pays for itself and one that drains your budget through replaced hardware.
This guide covers refillable cartridge maintenance tips 2026 that keep your Epson or Canon system running at peak performance: cleaning, clog prevention, chip resets, refilling, and storage.
What You'll Need Before You Start
Gather these supplies first:
- Nitrile gloves and a lint-free workspace
- Isopropyl alcohol (90% or higher)
- Lint-free swabs and paper towels
- The correct ink for your system (dye sublimation, DTF, pigment, or eco-solvent)
- A syringe or funnels for filling large format refillable ink cartridges
- Replacement chips if your current ones are failing
Mixing ink types or using the wrong viscosity fluid causes more clogs than any other error. Match your ink to the cartridge and printer every time.

Step 1: How to Clean Printer Ink Cartridges Safely
The goal is to remove residue without damaging seal integrity or the nozzle plate. Work slowly, and never let cleaning fluid pool inside the cartridge body.
Cleaning the Cartridge Body and O-Rings
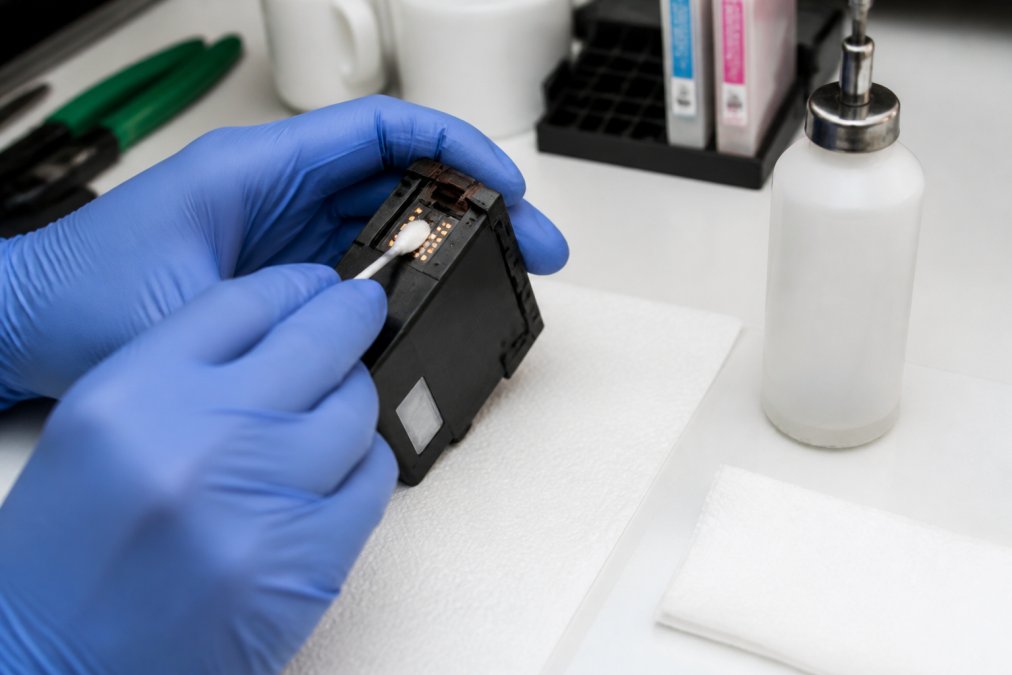
Wipe the cartridge body with a lint-free cloth lightly dampened with isopropyl alcohol, focusing on the o-ring and ink outlet. A worn or dirty o-ring breaks seal integrity and causes leaks; replace it if flattened or cracked.
Flushing the Printhead and Nozzle Plate
For the printhead, gently wipe the nozzle plate with isopropyl alcohol on a lint-free swab. Do not scrub; let dried pigment or dye soften, then wipe once. For stubborn clogs, a dedicated flushing solution works better than alcohol alone.
Step 2: Preventing Printhead Clogs with Refillable Ink
Preventing printhead clogs with refillable ink comes down to one principle: never let ink sit idle long enough to dry in the nozzle. Pigment and DTF inks settle and thicken when undisturbed, so print a test pattern every few days.
Daily and Weekly Habits That Stop Clogs
- Daily: Run a nozzle check if the printer has been idle for more than 48 hours.
- Weekly: Print a small color test page to keep all channels active.
- Weekly: Check ink levels and top off before a channel runs dry.
- Monthly: Inspect o-rings, cap station, and wiper blade for residue buildup.
Step 3: Ink Cartridge Chip Reset Guide
An ink cartridge chip reset guide is only useful if you understand what the chip does. The chip is a small EEPROM storing a cartridge identity code the printer checks against its firmware, plus a running ink-level counter. The printer does not measure ink physically; it estimates remaining ink from the counter and nozzle firings since the last reset. That is why a chip can report empty while the reservoir still holds ink.
How the Chip Communicates
On most Epson and Canon refillable systems, the chip talks to the printer through gold or copper contact pads on the cartridge face. The printer applies a low voltage and reads the chip's response; if the contacts are dirty, corroded, or misaligned, it reads a fault and refuses the cartridge or reports it empty. This is the most common cause of a false empty reading, so clean contacts before any reset attempt.
When to Reset vs. Replace the Chip
Work through this decision tree before buying a replacement chip:
- Clean the contacts first. Wipe the pads with a lint-free swab dampened with isopropyl alcohol 90% or higher. Let them dry, then reseat the cartridge. If the printer recognizes it, no reset is needed.
- Check for physical damage. Bent, scratched, or corroded pads will not read reliably. If damaged, replace the chip.
- Attempt a reset only if the cartridge holds ink. A reset on an empty cartridge can cause the printer to run dry, which damages the printhead.
- Replace the chip if resets no longer hold. A chip that resets and then immediately reports empty has a failing EEPROM.
- Replace the chip if it never registers at all. A chip the printer does not see on any slot is dead.
Reset Methods and Their Trade-offs
There are three common approaches, each with a cost:
- On-printer reset via a maintenance menu. Some Epson and Canon models expose a service menu that clears the ink counter. This is the cleanest method because it does not touch the chip hardware. Access varies by model and firmware version, and a firmware update can remove the menu.
- External chip resetter. A small device that clips over the chip contacts and rewrites the counter. Resetters are chip-family specific, so you need the right one for your cartridge line. They work well but add a tool and a step to your routine.
- Replacement chip. A fresh chip with a full counter. This is the most reliable option when a chip is failing, and the only option when the EEPROM itself is dead. Keep spares for your most-used colors to avoid downtime.
Keeping two spare chips per color can help mitigate chip failure during a job.
Firmware and Compatibility Notes
Firmware updates can change how the printer validates chips, so a chip that worked before an update may stop registering. If a reset stops working right after an update, the issue is usually the firmware, not the chip. Check compatibility notes for your printer model before assuming hardware failure, and do not downgrade firmware to restore chip function; the risk of bricking the printer outweighs the benefit.
Cleaning Contacts as Part of the Routine
Make contact cleaning a scheduled habit, not a reaction to a fault. Wipe the chip pads and the printer's contact pins with isopropyl alcohol during your monthly inspection; residue from ink mist and dust builds slowly, and clean contacts prevent most false empty readings. Clean green or white corrosion immediately, since it spreads and will destroy the chip.
Step 4: Refilling Without Overfilling or Air Bubbles
Overfilling is the most common cause of leaks and air bubbles in refillable cartridges. Fill to roughly 80-90% of capacity, never to the brim; ink expands as it warms and a full cartridge pushes ink past the seals.

Use a slow, steady pour with a syringe or funnel; fast filling traps air bubbles that show up later as dry hits or inconsistent flow. After filling, let the cartridge rest upright a few minutes so trapped air rises before reinstalling.
Step 5: Storage, Material Compatibility, and Long-Term Care
Storage conditions decide how long a cartridge lasts between uses, and material compatibility decides whether it survives at all. Most failures that show up as clogs or leaks start as a slow chemical reaction between the ink, cleaning agent, and cartridge body.
Material Compatibility by Cartridge Body and Ink Type
Not every cartridge material suits every ink, and not every cleaning agent is safe on every material. The table below reflects the combinations most practitioners find workable, and the ones that cause premature seal failure.
| Cartridge body / seal material | Compatible inks | Incompatible or risky | Cleaning agent notes |
|---|---|---|---|
| Polypropylene (PP) reservoir, EPDM o-rings | Water-based dye, water-based pigment | Eco-solvent, aggressive solvent blends | Isopropyl alcohol 90%+ is safe for short contact; do not soak |
| Polyethylene (PE) reservoir, silicone seals | Water-based dye, DTF pigment | Solvent-based, some eco-solvent | Alcohol wipes fine; avoid prolonged alcohol exposure on silicone |
| Glass body, PTFE seals | Dye, pigment, eco-solvent, some UV | None common, but PTFE can cold-flow under high clamp pressure | Alcohol, ammonia-free glass cleaner, distilled water flush |
| Metal (aluminum) body, Viton seals | Eco-solvent, UV, aggressive pigment | Water-based dye left long-term (corrosion risk) | Avoid chloride-containing cleaners; alcohol is generally safe |
| ABS plastic body | Water-based dye only | Pigment (settles and abrades), eco-solvent (softens ABS) | Isopropyl alcohol can haze ABS with repeated use |
Two rules follow: match the ink to the cartridge rating before you fill, and match the cleaning agent to the material. Isopropyl alcohol at 90% or higher is the default for contacts and nozzle plates, but it hazes ABS plastic and dries out silicone seals with repeated exposure (PubMed). For silicone-sealed cartridges, use a swab barely dampened with alcohol, then a distilled-water wipe; for glass and PTFE, alcohol is effectively inert.
Users who switch from water-based pigment to eco-solvent in the same cartridge often find the seals handle the first fill fine, then swell or harden within weeks. If you change ink families, change the cartridge and o-rings too.
Long-Term Storage Solutions
For cartridges you will not use for weeks or months, humidity and temperature matter most.
- Temperature: Store between roughly 60°F and 75°F. Below 50°F, pigment inks can separate and require extended agitation before reuse (PubMed). Above 85°F, evaporation accelerates and dye inks concentrate, shifting color (PubMed).
- Humidity: Aim for 40-60% relative humidity. Below 30%, seals dry and crack. Above 70%, condensation forms inside the reservoir and introduces water into water-based inks.
- Light: Keep cartridges in an opaque box or cabinet. UV degrades dye inks and can embrittle some plastic bodies.
- Orientation: Store upright with the ink outlet down, or seal the outlet with tape and store upright. Laying a cartridge on its side lets ink pool against the air inlet and wick into the vent, causing weeping on reinstall.
- Sealing: Tape the ink outlet and, if the cartridge has a separate air vent, tape that too. Label the fill date, ink type, and color on the body with painter's tape, not a permanent marker on the reservoir.
For pre-filled cartridges rotating through inventory, a sealed plastic bin with a desiccant pack holds humidity steady and keeps dust off the contacts. Before reuse, inspect the o-ring for flattening, clean the contacts with isopropyl alcohol, and run a priming cycle. If a cartridge has been stored longer than about six months, flush the reservoir with distilled water and refill fresh rather than topping off old ink.
Inspecting for Wear Before Storage
Before storage, spend thirty seconds checking the o-ring for cracks or flattening, looking for ink residue around the outlet, and confirming the chip contacts are clean and unbent. A cartridge stored with a failing o-ring leaks into its packaging and is unusable when you return to it; replacing a worn o-ring costs less than the ink you would lose.
Common Mistakes That Shorten Cartridge Lifespan
The fastest way to kill a refillable cartridge is to skip the small habits. What to avoid, and what to do instead:
| Mistake | Fix | Impact |
|---|---|---|
| Letting ink sit idle for weeks | Run a test print every few days | Prevents clogs and dry hits |
| Overfilling the cartridge | Fill to 80-90% capacity | Stops leaks and air bubbles |
| Mixing ink types in one cartridge | Match ink to cartridge rating | Protects seal integrity |
| Ignoring dirty chip contacts | Clean with isopropyl alcohol | Restores chip recognition |
| Storing cartridges in sunlight | Store upright, cool, and dark | Slows evaporation and residue |
Preventative care beats repair every time: a five-minute weekly routine extends cartridge lifespan well beyond what neglect allows.
Refillable systems reward consistency and punish neglect quickly. Printer Ink Pro stocks the refillable cartridges, replacement chips, and maintenance tanks that keep Epson and Canon systems running, along with funnels for clean, controlled refills. Get started with Printer Ink Pro and build a maintenance routine that protects your equipment and your margins.
Frequently Asked Questions
How many times can I safely refill a refillable ink cartridge?
Most refillable cartridges handle 15 to 30 refill cycles before the internal sponge or bladder loses elasticity and the seal integrity drops. The exact number depends on your ink type and how well you follow refillable cartridge maintenance. Pigment and DTF inks wear components faster than dye inks because of larger particle size. Inspect the o-ring and threading every 5 refills. Replace the cartridge when you see persistent leaks, cracked plastic, or color shifts that cleaning cannot fix.
How do I know when an ink cartridge chip needs to be reset or replaced?
Your printer will show an ink level warning or refuse to print even when the cartridge is visibly full. That is the signal to reset the chip. Auto-reset chips handle this automatically on most Epson EcoTank and WorkForce models. Manual reset chips need a reset tool or button press. If the chip does not respond after two reset attempts, or if the printer reports an unrecognized cartridge error, the chip itself has failed and needs replacement. Chips typically last through 10 to 20 reset cycles.
What is the best way to store refillable cartridges when not in use?
Keep them upright in a sealed plastic bag with a damp paper towel to maintain humidity around the nozzles. Store at room temperature, between 60 and 75 degrees Fahrenheit, away from direct sunlight and heat sources. Heat causes evaporation and changes oil consistency in pigment and eco-solvent inks. For long-term storage beyond two weeks, cap the ink ports and wrap the cartridge in cling film. Never store cartridges horizontally with the outlet facing down, as this causes leaks and air bubbles.
Can improper maintenance damage my printer's printhead?
Yes. Skipping cleaning routines lets residue buildup harden inside the nozzles, and forcing a clogged cartridge through a cleaning cycle pushes dried ink deeper into the printhead channels. Overfilling causes leaks that drip onto the printhead and circuit board. Using the wrong solvent for your ink type can also corrode internal components. A consistent maintenance checklist, including weekly nozzle checks and proper priming, prevents most printhead damage and keeps hardware durability intact.