

High Volume DTF Printing Workflow Guide for 2026
Table of Contents
- What High Volume DTF Printing Actually Demands
- Essential Equipment for a High Volume DTF Printing Workflow
- Step-by-Step High Volume DTF Production Workflow
- Startup Costs and ROI for High Volume DTF Printing
- Troubleshooting Common DTF Printing Issues at High Speed
- DTF Printer Maintenance Schedule for Production Shops
- DTF Transfer Storage Best Practices for Bulk Orders
- Scaling, Automation, and Bottleneck Analysis
- Frequently Asked Questions
Last Updated: September 13, 2026
What High Volume DTF Printing Actually Demands
High volume DTF printing is a production discipline, not a scaled-up hobby setup. It demands that every stage of the transfer process, from PET film feed to final heat press, run at a predictable rate without constant operator intervention. This guide from Printer Ink Pro breaks down what separates a shop printing a few dozen transfers a day from one running thousands.
The gap comes down to three things: throughput, color consistency, and uptime. A single clogged print head or a mis-set curing oven can stall an entire batch. Shops that treat DTF as a manufacturing line, with defined cycle times and maintenance windows, keep their presses running. Those that treat it as an art project lose days to reprints.
Below, we'll show you exactly what equipment, workflow, and cost structure a high volume DTF operation actually requires.
Essential Equipment for a High Volume DTF Printing Workflow
The equipment stack for high volume DTF splits into two halves: the print side and the finishing side. Both must match in capacity, or one becomes the bottleneck.
Printers, RIP Software, and Color Profiles
Production DTF printers use industrial print heads with recirculation systems to keep white DTF ink moving and prevent settling. RIP software converts your artwork into the CMYK+W separation the printer needs, and it controls ink limits, halftone patterns, and the color profile that governs output.

A stable color profile matters more at volume than at low output. When you print the same design across multiple rolls of PET film, drift shows up as visible batch-to-batch variation. Lock in a profile, verify it with a nozzle check before each run, and re-verify after any ink change.
Curing Ovens, Powder Shakers, and Heat Presses
The finishing line determines your real throughput. A curing oven needs even heat across its full width, and a powder shaker must apply adhesive powder uniformly so transfers survive washing. Heat presses should have consistent pressure and temperature control, because uneven pressure causes partial transfers that fail in the customer's hands.
For shops running mixed workloads, Printer Ink Pro supplies DTF inks and a White DTF Hot-Melt Adhesive Powder that melts evenly and bonds to cotton and polyester blends. The powder comes in a 2.2 lb (1kg) container for shops going through it quickly (nist.gov).
Step-by-Step High Volume DTF Production Workflow
The production workflow follows seven stages. Each one has a defined output and a checkpoint before the next begins.
- Prepare artwork and impose jobs. Group similar designs to minimize film changes and color shifts.
- Run the RIP and queue jobs. Batch processing keeps the print head busy and reduces idle cycles.
- Print onto PET film. Verify a nozzle check before the run starts.
- Apply adhesive powder. Shake evenly, then remove excess so the coating is consistent.
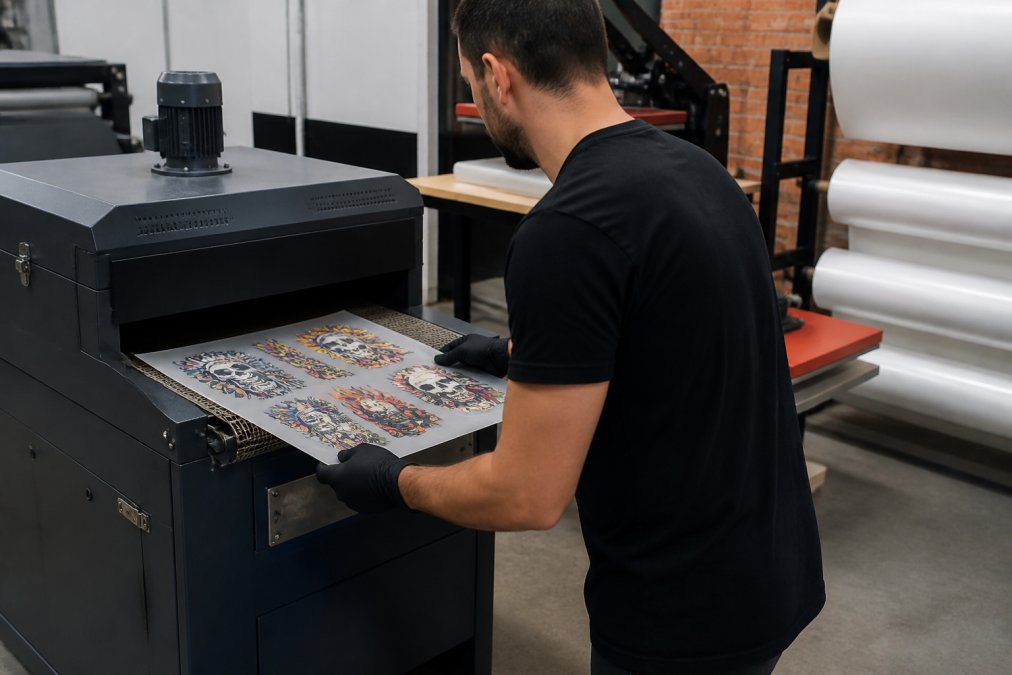
- Cure the powder. Run the film through the oven at a temperature that fully melts the powder without warping the film.
- Press the transfer. Match time, temperature, and pressure to the fabric.
- Cool and inspect. Peel test a sample from each batch before packing.
Startup Costs and ROI for High Volume DTF Printing
Startup costs for a production DTF line fall into four buckets: the printer, the finishing line, consumables, and the facility. What separates a real budget from a guess is attaching a throughput number to each bucket so you can calculate cost per transfer instead of cost per machine.
| Cost Category | What It Covers | One-Time or Ongoing |
|---|---|---|
| Printer and print heads | Production DTF printer, spare print head, capping station parts | One-time, recurring for heads |
| Finishing line | Curing oven, powder shaker, heat press, press pads | One-time |
| Consumables | PET film, DTF ink (CMYK + white), hot-melt adhesive powder | Ongoing |
| Facility | Ventilation and fume extraction, dedicated circuit, floor space, climate control | One-time plus utilities |
| Software | RIP license, color profiling hardware, job queuing or tracking tools | One-time plus subscription |
Because equipment prices shift with print head supply and freight, build your budget from current quotes rather than published list prices. The structure matters more than any single figure: a production printer typically costs several times a desktop DTF unit, and the finishing line, oven, shaker, and press, often rivals the printer itself in total spend. Budget the finishing line first, because it sets your ceiling on throughput.
The ROI Math That Actually Matters
ROI in DTF is not a single number. It is cost per transfer compared against your sell price per transfer, and it moves fast with utilization.
Work it in four steps:
- Fixed cost per month. Add equipment depreciation, facility, software, and labor for the hours the line runs.
- Variable cost per transfer. Film, ink, and powder consumed per transfer, plus waste and reprints.
- Effective throughput. Transfers per hour at your real cycle time, not the printer's rated speed. The slowest stage in the line sets this number.
- Cost per transfer. Fixed cost divided by monthly volume, plus variable cost per transfer.
A common pattern is that a shop running one shift at partial capacity has a cost per transfer several times higher than the same shop running two shifts near capacity, because fixed costs spread across more units. That is why adding a second printer before filling the first one rarely improves the math, it adds fixed cost without adding sellable output.
Where the Budget Quietly Breaks
- Reprint rate. Every failed transfer carries the full cost of film, ink, powder, and press time. A reprint rate that creeps from a few percent to double digits can erase margin before anyone notices.
- Idle time. Equipment that sits between jobs still depreciates and still occupies floor space.
- Consumable yield. Powder that is over-applied or not reclaimed, and film wasted on setup strips, show up as variable cost you never priced.
- Labor at the press. Heat pressing is often the least automated stage and the most labor-intensive per unit.
Troubleshooting Common DTF Printing Issues at High Speed
Troubleshooting common DTF printing issues starts with isolating which stage failed, because the symptom rarely points to the actual cause. A washed-out transfer could be an ink problem, a powder problem, or a press problem.
- Clogged white ink channels. Usually a recirculation or idle-time issue. Keep the white ink moving and run nozzle checks between jobs.
- Banding in gradients. Often a color profile or print head alignment problem, not an ink defect.
- Powder not adhering evenly. Check shaker coverage and humidity in the room.
- Transfers cracking after washing. Under-cured powder or too little pressure at press time.
- Color shift between batches. Profile drift or an ink batch change without re-profiling.
A common mistake is changing multiple variables at once. Change one thing, run a test, then move on.
DTF Printer Maintenance Schedule for Production Shops
A DTF printer maintenance schedule for production shops should be built around print hours, not calendar days. High-output machines accumulate wear faster than a hobby printer ever will.
- Daily: nozzle check, wipe print head, check ink levels and waste tank.
- Weekly: clean the capping station, inspect powder shaker for buildup, check oven temperature consistency.
- Monthly: replace or deep-clean filters, verify color profile, inspect tubing and fittings.
- Quarterly: full print head inspection, replace worn press pads, review fume extraction performance.
DTF Transfer Storage Best Practices for Bulk Orders
DTF transfer storage best practices for bulk orders come down to moisture, heat, and stacking pressure. Cured transfers are stable, but they degrade if stored poorly.
- Store transfers flat, not folded, to prevent powder cracking along creases.
- Keep them in a cool, dry area away from direct heat and sunlight.
- Use moisture-barrier bags for long-term storage, especially in humid climates.
- Label batches by date and design so older stock moves first.
- Avoid stacking heavy boxes on top of transfers, which can crush the powder layer.
Shops that ship bulk orders should pack transfers flat in rigid mailers. Bending a transfer in transit undoes a perfect press.
Scaling, Automation, and Bottleneck Analysis
Scaling a high volume DTF operation means finding the constraint before adding capacity. Adding a second printer does nothing if the powder shaker or heat press is already the limit. This is the section most guides skip, so treat it as the operating manual for the stage after startup.
Run a Real Bottleneck Analysis
A bottleneck analysis is a time study, not a guess. Run it across a full production day:
- Timestamp every stage transition. Record when a job enters and leaves printing, powder application, curing, and pressing.
- Calculate cycle time per stage. Total stage time divided by units completed gives you seconds or minutes per transfer at that stage.
- Find the longest queue. The stage where work-in-progress piles up is your constraint, even if it is not the slowest stage in isolation.
- Measure utilization. If a stage runs near 100 percent while others sit idle, you have found the ceiling.
- Fix the constraint, then re-measure. Relieving one bottleneck moves the constraint downstream, expect it to reappear somewhere else.
Common DTF constraints, in rough order of frequency: manual powder application, a single heat press, curing oven width and belt speed, RIP processing on an underpowered workstation, and operator-dependent film handling. Note that print speed is rarely the first constraint in a shop that has already bought a production printer, the finishing line usually is.
Throughput Math Before You Buy
Before adding hardware, calculate the throughput each stage can deliver and compare it to your target. If your oven can cure a fixed number of linear feet per minute and your film layout yields a known number of transfers per foot, you can estimate the oven's ceiling. Do the same for the press: presses per hour equals 60 divided by press cycle time in minutes, multiplied by the number of operators. The lowest ceiling in the chain is your realistic output. Buy against that number, not against the printer's rated speed.
Workflow Automation That Pays Back
Automation in DTF is mostly about removing operator decisions, not removing operators:
- Automated job queuing and RIP batching. Group jobs by film width and color profile so the printer runs longer between setups.
- Imposition templates. Pre-build layouts for your most common transfer sizes to cut film waste.
- Production tracking dashboards. Log stage timestamps automatically so bottleneck analysis becomes a report instead of a stopwatch exercise.
- API integrations. Connect your order system to the RIP queue so jobs enter production without manual re-entry, which removes a common source of wrong-file reprints.
- Barcode or QR job tickets. Scan at each stage to capture cycle time and reprint cause without paperwork.
Quality Control Metrics for High Volume
Most guides cover wash-fastness and color consistency in theory. At volume you need numbers you can trend:
- Reprint rate. Percentage of transfers reprinted, tracked by cause (clog, powder defect, press error).
- Wash-test pass rate. Run a standardized wash test on a sample from each batch, consistent temperature, detergent, and cycle count, and record pass or fail. Consistency of the test matters more than the exact protocol.
- Color delta between batches. Measure the same reference patch on each run and record the difference. A drifting delta is an early warning of profile or ink-batch change.
- Adhesive coverage score. Visual or weight-based check of powder uniformity on a sample strip per roll.
- First-pass yield. Percentage of units that pass inspection without rework.
Trend these five numbers weekly. A rising reprint rate or a widening color delta tells you the process is destabilizing before customers see it.
Environmental and Waste Considerations
DTF produces PET film waste, spent adhesive powder, and ink waste (the EPA). Shops that separate film waste for recycling, reclaim excess powder where the shaker allows, and maintain fume extraction properly reduce both regulatory exposure and material cost. At volume, waste handling is a line item, not an afterthought, and it is the angle most competing guides ignore entirely.
Frequently Asked Questions
What are the essential components of a high volume DTF production line?
A complete high volume DTF printing workflow needs a DTF printer with a recirculation system for white ink, RIP software for job queuing and color profiles, a powder shaker with an integrated curing oven, and a heat press for transfer application. Add a ventilation system with fume extraction, a nozzle check routine, and spare print heads to avoid downtime. Every component must handle batch processing without manual intervention between jobs.
How do you maintain consistent print quality in high volume DTF printing?
Run a nozzle check before every production shift, use CMYK+W color profiles calibrated to your specific DTF ink, and control humidity in your print room. Print test strips at the start of each batch to catch color shifts early. A recirculation system keeps white ink moving and prevents settling, which is the most common cause of inconsistent opacity in high volume DTF printing.
How can you reduce waste in a high volume DTF printing workflow?
Nest multiple jobs onto a single PET film sheet using RIP software, which cuts film and ink waste significantly. Reclaim misprinted transfers by reusing the film when possible, and store adhesive powder in sealed containers to prevent moisture clumping. Track your daily film-to-transfer ratio; a drop in that number usually points to a bottleneck in curing or powder application.
What are the best practices for curing and storing DTF transfers at scale?
Cure transfers at the temperature and time your adhesive powder manufacturer specifies, typically until the powder gels and the film cools flat. Store finished transfers in a cool, dry place away from direct sunlight, stacked between sheets of parchment or in sealed bags. Humidity is the enemy of DTF transfer storage best practices; moisture causes powder to clump and transfers to stick together.
How do you troubleshoot common DTF printing issues during high-speed production?
Start with the most frequent culprits: clogged white ink channels, incorrect powder application, and curing temperature drift. Run a nozzle check to rule out print head issues, verify your powder shaker is distributing evenly, and confirm your oven holds the target temperature. Keep a log of every stoppage so you can spot patterns. Most troubleshooting common DTF printing issues comes down to maintenance timing.
What DTF printer maintenance schedule works for a production shop?
Daily: nozzle check, white ink recirculation, and print head wipe. Weekly: clean the capping station, check ink lines for air bubbles, and inspect the powder shaker for buildup. Monthly: replace dampers if needed, deep clean the curing oven, and calibrate your heat press temperature. A written DTF printer maintenance schedule prevents the clogging and color drift that kill throughput.
How do you organize DTF transfers for bulk orders?
Label every transfer with the order number, size, and date printed. Group transfers by customer or job in flat, labeled bins or folders. For DTF transfer storage best practices, keep them away from heat and moisture, and use a first-in-first-out system so older transfers ship first. Digital job queuing in your RIP software should mirror your physical organization so pickers can find any transfer in seconds.
What are the best DTF print settings for high accuracy at volume?
Use the color profile supplied by your DTF ink manufacturer, set your printer to the highest quality mode that still meets your throughput target, and match your white ink laydown to the fabric type. For blends and dark garments, increase white ink density. Always print a test strip before a large batch. Your exact settings depend on your print head and ink combination, so document what works and stick to it.